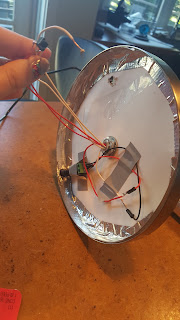
However, we didn't want out button to be in the breadboard, because we wanted the person who used our lamp to be able to easily turn it off. So we soldered four wires to the button and placed it at the bottom part of the lamp. We also taped paper on the bottom of the lamp because it was entirely made of metal. (Image on left is the button on the breadboard, image on right is the button hooked up on the bottom.)
We also drilled a hole in the base of the lamp, and spray painted a wooden button silver to make the micro button larger.
Below you can see our final circuit. We used a paper towel cardboard tube as the main structure of our lamp, and wrapped around the LED strips at the top. We attached all our parts to this tube--our Arduino, the sound detector shield and the Breadboard.


No comments:
Post a Comment