Hokay so.
In order to learn to become awesome at Arduino building and programming,
our class has been given a few exercises from the second edition of,
"Getting Started with Arduino," by Massimo Banzi.
our class has been given a few exercises from the second edition of,
"Getting Started with Arduino," by Massimo Banzi.
The first exercise required that we set up the Arduino
(connect it to the computer with the USB and plug an LED into digital
IO pin #13 and the GND pin), and upload a code to make a single LED flash.
(connect it to the computer with the USB and plug an LED into digital
IO pin #13 and the GND pin), and upload a code to make a single LED flash.
The steps were very well described, making it easy to understand, and fun to watch unfold.
After these few steps, we had a flashing LED worthy of a miniature dance party...
[Feat. Kanye West "Flashing Lights"]
After seeing results so quickly, we decided (in the true spirit of Bruce Dickinson)
we needed More Arduino... And went on to exercise two.
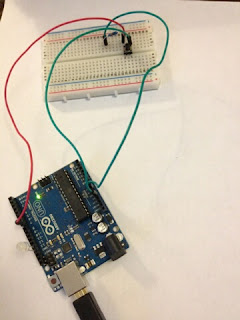
This meant we had more connections to make before we could control our
LED actuator with a pushbutton sensor, instead of just with code.
Connecting the button as the interactive sensor:
And more connections..
And more connections...
After connecting the resistor and pushbutton to the breadboard
we used jumper wires to run a current from the Arduino,
through the breadboard, and back to give it life!
we used jumper wires to run a current from the Arduino,
through the breadboard, and back to give it life!
Then we copied new code into the sketch, verified it,
and uploaded it to the Arduino via USB.
Now, we are able to control the dance party.
This version of Bridget and Shelby versus the Arduino = Success.


No comments:
Post a Comment