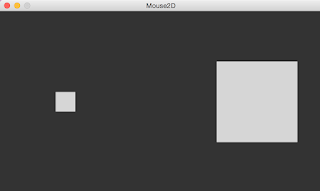
For my Processing assignment, I changed up the Mouse 2D Example found in the Examples folder of Processing. Mouse 2D allows the interactor/user to change the size and location of 2 squares (or rectangles) based on it's mouseX and mouseY positions, and their inverse positions. This looks a little like this to start off with:

Here, my mouse is in the bottom right corner of the screen, as the shape on the left grows smaller as the mouse's Y coordinate goes towards the bottom of the screen, and more to the left as the mouse's X coordinate goes towards the right of the screen. Oppositely, the shape on the left follows the mouse exactly, growing larger as the mouse's Y coordinate goes towards the bottom of the screen, and moving more right as the mouse's X position goes towards the right of the screen. The color fill stays white throughout the entirety of the interaction and the squares only get so big and so small.
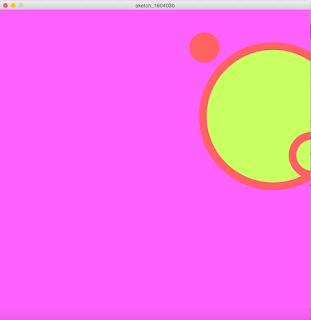
Here's what I changed:


For this change, I wanted to make the color change based on the mouse interaction and add another shape that corresponded to color change but maintained its own shape. I started by making the size of the background a little larger and squarer, and making the color change based on the mouseX and mouseY position on the screen. I also changed the shape of the rectangles to being circles that vary in size based on their mouseX and mouseY positions, also changing color based on mouseX and Y positions on the screen. Similarly, I added a thick stroke that changes color based on mouseX and Y positions on the screen. Lastly, I added a third circle that maintains shape throughout the entirety of the interaction but changes color in the same way that its nearby circle does.
Here's the old code:
void setup() {
size(640, 360);
noStroke();
rectMode(CENTER);
}
void draw() {
background(51);
fill(255, 204);
rect(mouseX, height/2, mouseY/2+10, mouseY/2+10);
fill(255, 204);
int inverseX = width-mouseX;
int inverseY = height-mouseY;
rect(inverseX, height/2, (inverseY/2)+10, (inverseY/2)+10);
}
Here's the new code:
void setup() {
size(800,800);
noStroke();
ellipseMode(CENTER);
}
void draw() {
background(mouseX,mouseY,255);
fill(mouseX,100,mouseY);
ellipse(mouseX, mouseY, mouseY/2+10, mouseY/2+10);
stroke(mouseX,mouseY,100);
strokeWeight(20);
fill(200,mouseX,mouseY);
int inverseX = width-mouseX;
int inverseY = height-mouseY;
ellipse(inverseY, inverseX, (inverseY/2)+10, (inverseY/2)+10);
ellipse((inverseY+100), (inverseX+100), 100, 100);
}
Altogether, I worked on learning more about Processing, which doesn't necessarily come easily to me, and focused on specifically how mouseX and mouseY work, along with inverses and integers.
No comments:
Post a Comment